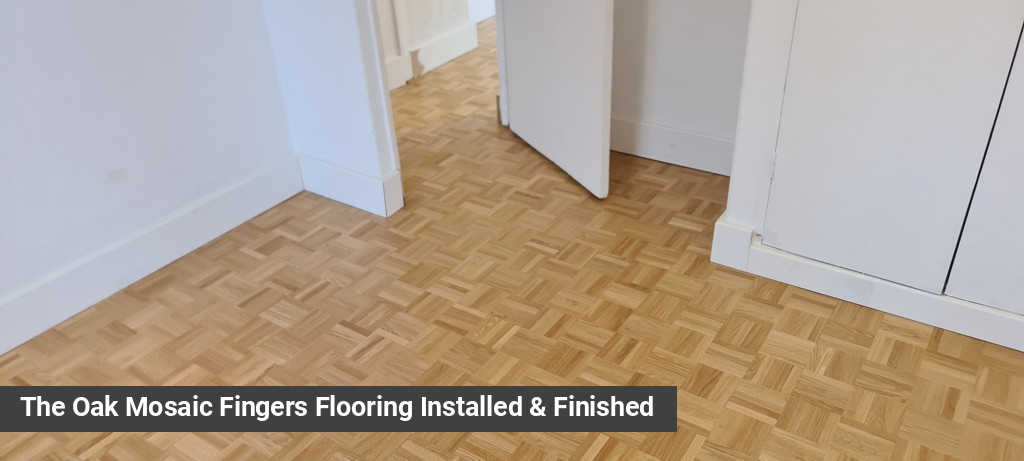
Solid wood mosaic fingers flooring installation over concretem requires subfloor prep, damp-proofing and excellent floor finish
Solid oak mosaic finger flooring offers a timeless aesthetic and a durable surface, but its successful installation over a concrete subfloor requires meticulous preparation and execution. This guide outlines the process, from initial subfloor preparation to the final sealing with Bona Mega matt lacquer, ensuring a beautiful and long-lasting floor.
Floorworks provides supply & fit service for oak and mahogany mosaic fingers from stock. For product advice, availability and free site visits, speak to membee of staff.
Installing solid wood directly onto concrete presents challenges, primarily due to potential moisture transfer from the concrete and the need for a perfectly level and stable base. Addressing these factors through priming, levelling, and the application of a liquid damp proof membrane (DPM) is crucial for preventing future issues such as warping, lifting, or adhesive failure.
1. Subfloor Preparation: The Foundation of Success
Before any new flooring can be laid, the concrete subfloor must be thoroughly prepared. This involves ensuring the concrete is clean, dry, and free from dust, debris, old adhesives, or contaminants. Any cracks or holes should be repaired using a suitable concrete filler.
A critical step when installing over concrete, especially in older properties or where residual moisture is a concern, is to assess the moisture content of the subfloor. While ideal moisture levels for wood flooring installation are low (typically below 3% for concrete), achieving this can be challenging. This is where a liquid DPM becomes essential.
2. Priming for Adhesion and Control
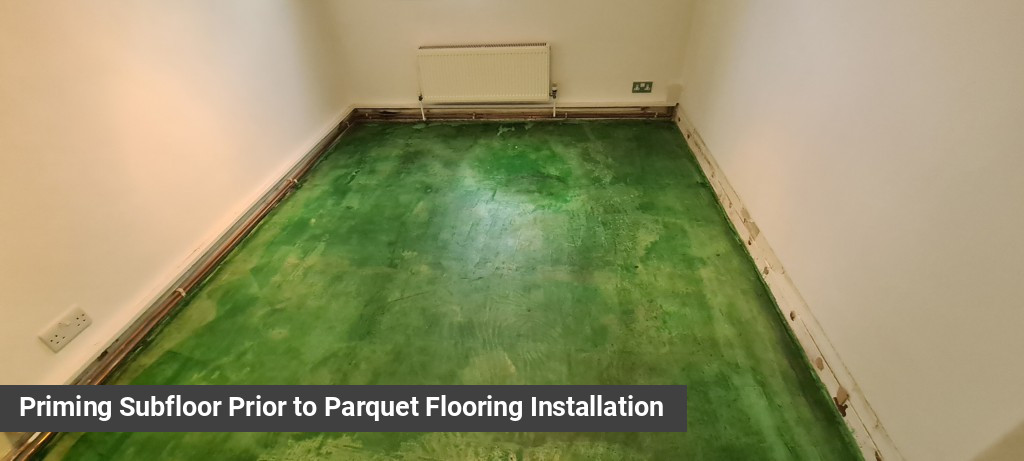
With the concrete clean and repaired, the next step is to apply a primer. For installations involving a levelling or smoothing compound, a gritted primer is often recommended. This type of primer contains fine grit that provides a mechanical key, significantly enhancing the bond between the smooth concrete and the applied compound. The primer also helps to control the absorption rate of the concrete, preventing the rapid loss of moisture from the levelling compound, which could otherwise lead to pinholes or a weakened bond. Apply the primer evenly according to the manufacturer's instructions, allowing adequate drying time.
3. Achieving a Perfect Plane: Subfloor Levelling & Smoothing
Solid wood mosaic finger flooring requires a very flat and level subfloor for a successful installation and a seamless finish. Self-levelling or smoothing compound is applied over the primed concrete to correct any imperfections, dips, or cracks in the subfloor.
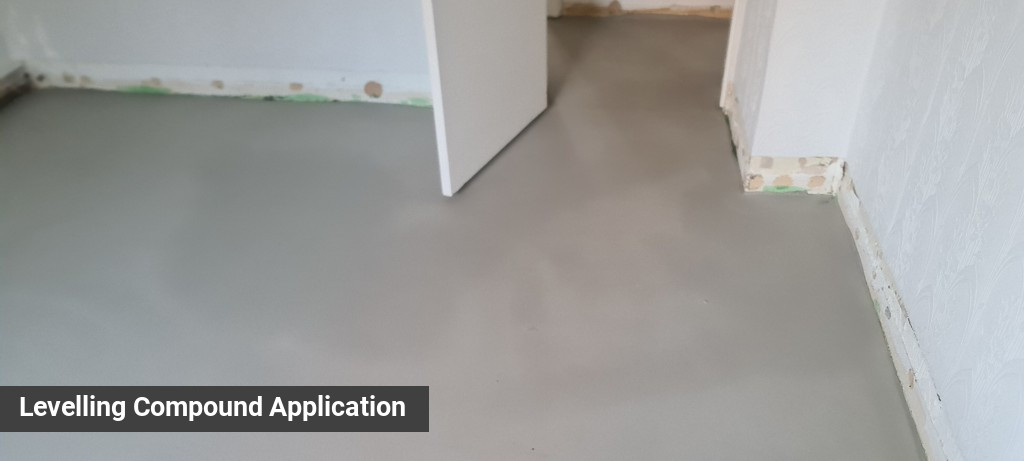
Carefully mix the compound following the manufacturer's guidelines, ensuring the correct water ratio for optimal flow and strength. Pour the mixed compound onto the prepared subfloor, spreading it with a trowel or a suitable applicator. The compound will naturally seek a level surface, but some assistance may be needed to ensure even coverage and a smooth finish. A spiked roller can be used while the compound is still wet to release any trapped air bubbles. Allow the levelling compound to cure fully according to the manufacturer's instructions before proceeding.
4. The Moisture Barrier: Applying the Liquid DPM
Even after addressing the general flatness and porosity of the subfloor, a liquid DPM is a vital layer of protection against residual and rising moisture from the concrete. This is particularly important for solid wood, which is highly susceptible to moisture fluctuations.
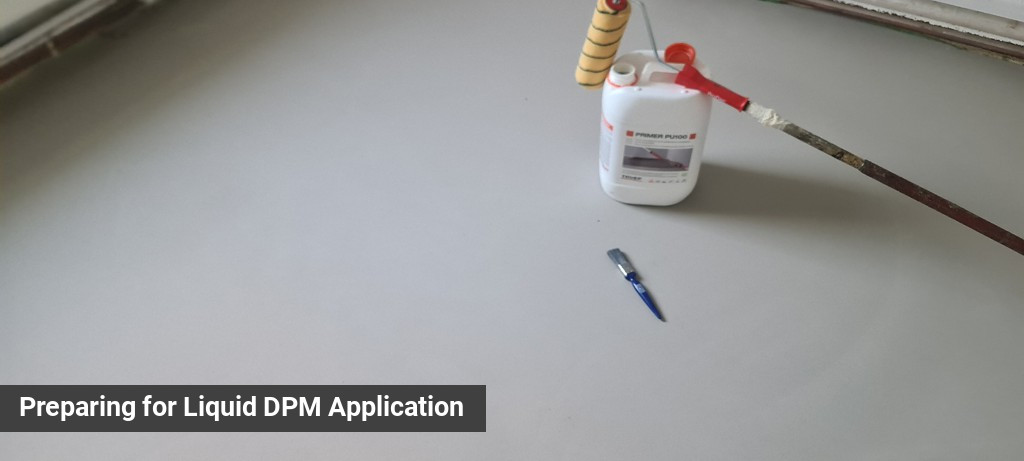
Apply the liquid DPM evenly across the cured levelling compound using a roller or brush. Most liquid DPMs require two coats, applied at right angles to each other to ensure a complete and pinhole-free barrier. Pay close attention to edges and corners, ensuring full coverage. Allow each coat to dry to the manufacturer's specifications before applying the next and before proceeding with the flooring installation.
5. Laying the Mosaic Fingers
With the subfloor fully prepared, level, and protected against moisture, the installation of the solid oak mosaic finger flooring can begin. Mosaic finger panels typically come in small sections of individual fingers held together by a mesh backing.
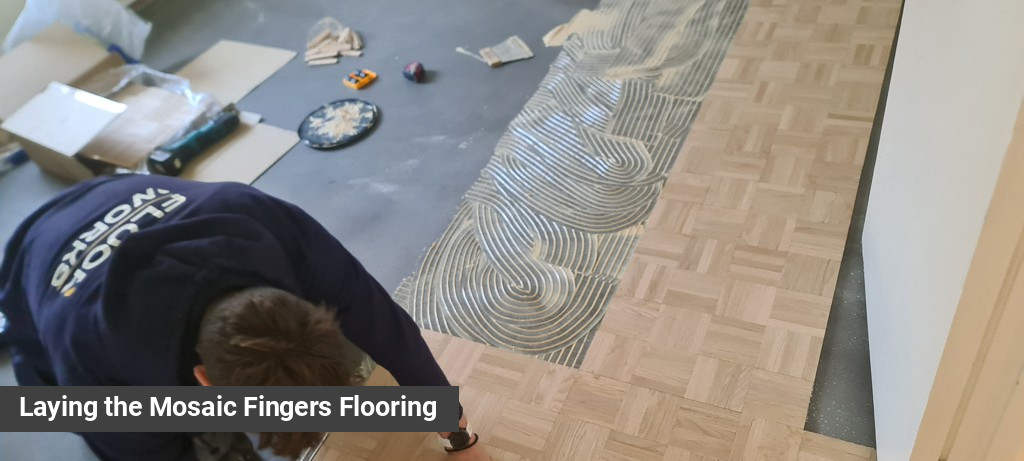
Determine the starting point and the desired pattern for your mosaic floor. It is often advisable to start from the centre of the room or along a main sightline to ensure symmetry. A high-quality, flexible wood adhesive specifically designed for use with solid wood over concrete is essential. Spread the adhesive evenly over a manageable area of the subfloor using a notched trowel.
Carefully lay the mosaic finger panels into the wet adhesive, pressing them firmly to ensure good contact. Use spacers against walls to maintain the required expansion gap, as solid wood will expand and contract with changes in humidity. Continue laying the panels, ensuring tight joints and a consistent pattern. Cut the panels as needed to fit the edges and around obstacles.
6. Sanding for a Smooth Surface
Once the adhesive has fully cured and the floor is stable, the next step is sanding. Mosaic finger flooring, with its multiple small blocks and varying grain directions, requires careful sanding to achieve a smooth and uniform surface.
Begin with a coarse-grit sandpaper on a drum or belt sander to remove any adhesive residue, height differences between panels, and to level the floor. Due to the nature of the mosaic pattern, sanding across the grain at an angle may be necessary in the initial stages to effectively level the blocks. Progress through finer grits (e.g., 60, 80, 100/120 grit) to remove sanding marks and achieve a smooth finish. An edge sander will be needed for the perimeter of the room. Thoroughly vacuum the floor between each sanding step to remove all dust.
7. Filling the Gaps
After sanding, small gaps between the individual fingers and panels may become apparent. Gap filling is crucial for creating a seamless look and preventing dirt accumulation. A common method for solid wood floors is to use a mix of fine wood dust collected during the final sanding stages and a clear resin binder.
Mix the wood dust with the resin to create a thick paste. Apply the paste generously across the floor using a trowel or wide spatula, working it into all the gaps. Scrape off any excess filler from the surface. Once the filler is dry, the floor will require a final light sanding with a fine-grit paper to remove any residual filler and ensure a perfectly smooth surface ready for sealing. Vacuum thoroughly to remove all dust.
8. Sealing with Bona Mega Matt Lacquer
The final step is to protect the beautiful solid oak floor with a durable and aesthetically pleasing finish. Bona Mega is a popular choice for residential and light commercial areas, known for its durability and ease of use. Using a matt lacquer will provide a low-sheen finish that highlights the natural beauty of the wood without being overly reflective.
Ensure the floor is completely free of dust before applying the lacquer. Apply the first coat of Bona Mega matt lacquer evenly using a roller or brush, working in sections and following the grain direction where possible. Avoid applying too thickly, as this can lead to drying issues. Allow the first coat to dry according to the manufacturer's instructions.
Lightly abrade the first coat with a fine-grit screen or sandpaper if recommended by the manufacturer, then vacuum thoroughly. Apply a second coat of Bona Mega matt lacquer, again ensuring even coverage. A third coat may be applied for extra durability, following the same process.
Allow the final coat of lacquer to cure fully before placing furniture or allowing heavy traffic on the floor. Refer to the Bona Mega technical data sheet for specific drying and curing times.
By following these steps diligently, you can successfully install solid oak mosaic finger flooring over a concrete subfloor, creating a stunning, durable, and classic floor that will be enjoyed for many years to come.
Need a Quote for Mosaic Fingers Flooring Supply & Fit?
Get in touch for product availability, installation advice or to book a site survey for mosaic fingers flooring installation with Floorworks.