
It's a question that sounds straightforward but isn't. The answer isn't a single number — it's a sequence of numbers, chosen differently for each floor type, each species, and each starting condition. Get the sequence right and the floor comes out perfectly smooth and ready to take a finish that bonds and performs exactly as it should. Get it wrong and the problems range from visible scratch marks in the final finish to unnecessary removal of timber that could have been preserved.
This isn't really about sandpaper. It's about understanding what each grit is doing to the surface and why the order matters as much as the grits themselves.
Understanding the Grit Scale First
Grit numbers describe the coarseness of the abrasive particles on a sanding sheet. The number refers to the mesh size used to grade the particles — the higher the number, the finer the abrasive, the less material it removes, and the smoother the surface it produces.
- Lower numbers (P24 – P40) — very coarse. Used only for the most aggressive stock removal — heavy paint, thick contamination, severely cupped or uneven surfaces. Leaves deep scratches that subsequent grits need to remove.
- Mid-range numbers (P60–P80) — medium coarse to medium. The working range for most initial passes on solid timber floors. Removes old finish and surface damage while not going so deep that the scratch marks become hard to eliminate in subsequent passes.
- Higher numbers (P100–P120) — medium fine. The transition grits — removing the scratch pattern of the previous pass and refining the surface toward finishing standard.
- Fine numbers (P150–P180+) — fine to very fine. Used for the final buffing stages and between-coat sanding on lacquered surfaces. Not stock removal tools — surface preparation and finish refinement.
The key principle: each grit removes the scratch marks left by the previous grit and introduces its own, finer scratch pattern. By the time the finest grit has done its work, the scratches are too fine to be visible through the finish — but they're still there, providing the microscopic tooth that the lacquer or oil bonds to. A surface that looks perfectly smooth to the eye before finishing has been carefully abraded to a standard that makes a finish perform.
Why the Starting Grit Matters So Much
The instinct with a worn or damaged floor is to start with the coarsest grit available — to get material off quickly. This instinct is correct in some situations and genuinely damaging in others.
- Starting too coarse on a floor that doesn't need it removes more timber than necessary, shortens the floor's future sanding potential, and creates deep scratch marks that require additional sanding passes to eliminate — sometimes more passes than the coarser starting grit saved in the first place. On an engineered floor with a 3mm top layer, starting with P24 when P60 would have been sufficient is a meaningful mistake in terms of remaining material.
- Starting too fine on a floor with a thick old finish or heavily contaminated surface means the abrasive clogs quickly, makes little progress, and produces a result that looks polished rather than stripped — the new finish goes on top of the old degraded one rather than bonding to clean timber. The floor looks acceptable for a while and then starts failing from below.
- The right starting grit is the coarsest grit that genuinely addresses the condition of the floor — and no coarser.
The Grit Sequences We Use at Floorworks
There is no universal grit sequence that applies to every floor. The starting point and the progression depend on four things: the floor type, the species, the current condition, and what the floor needs to end up as. Here's how we approach the main scenarios.
Solid Hardwood Floors — Standard Restoration
For a solid oak, ash, or walnut floor in reasonable condition — finish worn but not multiple layers thick, no significant contamination — a typical sequence runs:
P36 or P40 → P60 → P80 → P100 → buff with P150 or P180 screens
The coarse pass strips the old finish. The P60 begins removing the deep scratches from P36/40 while continuing to open up the surface. P80 refines further. P100 brings the surface to finishing standard. The final buff with 150 or 180 grit screens — using rotary buffer rather than drum sander — removes the last of the sanding marks and produces the uniformly abraded surface that lacquer or oil bonds to properly.
For a heavily finished floor — multiple lacquer layers, thick contamination — the starting point moves to P24 or P36 with the Mirka DEROS RS rotary machine before the drum sander sequence begins. The rotary machine's aggressive cutting action strips the heavy material fast; the subsequent drum sander sequence then takes over at P60 onwards.
Pine Floorboards — The Softwood Consideration
Pine is a softwood — significantly softer than oak — and it requires a different starting point. A coarse grit that's right for oak will leave deep scratches in pine that take more subsequent passes to remove than the initial aggression was worth.
For pine floorboards, our typical sequence runs:
P40 → P60 → P80 → P100 → buff with P150 or P180 screens
The P40 start on pine — rather than P24 or P36 — reflects the softer material. On a Shoreditch pine floorboard project, we finished sanding at fine grits of 80–100 before the rotary buff with 180 grit screens — the fine stages being what determine the quality of the finish on a softwood surface where the grain is more open and more susceptible to the visible scratch pattern that inadequate final sanding leaves.
Parquet Flooring — The Grain Direction Challenge
Parquet is technically the most demanding sanding discipline — not because the grits are different, but because the direction of sanding has to account for blocks running at 90 degrees to each other in herringbone, or at angles in chevron. Standard drum sanding with the grain isn't possible when the grain is running in multiple directions simultaneously.
The approach for parquet involves diagonal sanding across the whole floor — typically at 45 degrees to the main traffic direction — which means the sanding is working across the grain of some blocks and with the grain of others simultaneously. This requires more care with grit progression because cross-grain sanding leaves more visible marks than with-grain sanding, and those marks need to be fully eliminated before the finer stages begin.
For merbau parquet, we completed thorough sanding finishing in fine abrasive grits of P100 and buffed with P180 grit screens — the exotic wood species requiring a more careful approach to avoid the surface tearout that coarser grits can cause in dense, interlocked grain structures.
A typical parquet grit sequence runs:
P40 (diagonal) → P60 (diagonal) → P80 (diagonal or with grain of dominant blocks) → P100 → buff with P150 or P180 screens
For more on the specific challenges of parquet sanding, see our parquet floor restoration service.
Engineered Wood Floors — Where Caution Is Most Critical
Engineered floors demand the most conservative approach to grit selection of any floor type — because the top layer is thin (typically 3mm to 4mm on most products, up to 6mm on premium boards) and every sanding removes some of it permanently.
The starting grit on an engineered floor is never coarser than the condition genuinely requires. For a floor in reasonable condition with a worn finish, a starting grit of P60 is usually appropriate — aggressive enough to strip the old finish without the material removal of P36 or P40. The sequence then runs:
P60 → P80 → P100 → buff with P150 or P180 screens
The minimum residual top layer we work to at Floorworks is 2.5mm after sanding — which means the grit selection and the number of passes have to be calibrated to achieve the result without crossing that threshold. On a floor that's already been sanded once, the starting grit drops further — sometimes P80 or even P100 — because the goal is to remove only the finish, not significant timber.
For a detailed guide to engineered floor restoration and the constraints that make grit selection so important, see our article on restoring engineered floors.
Stairs
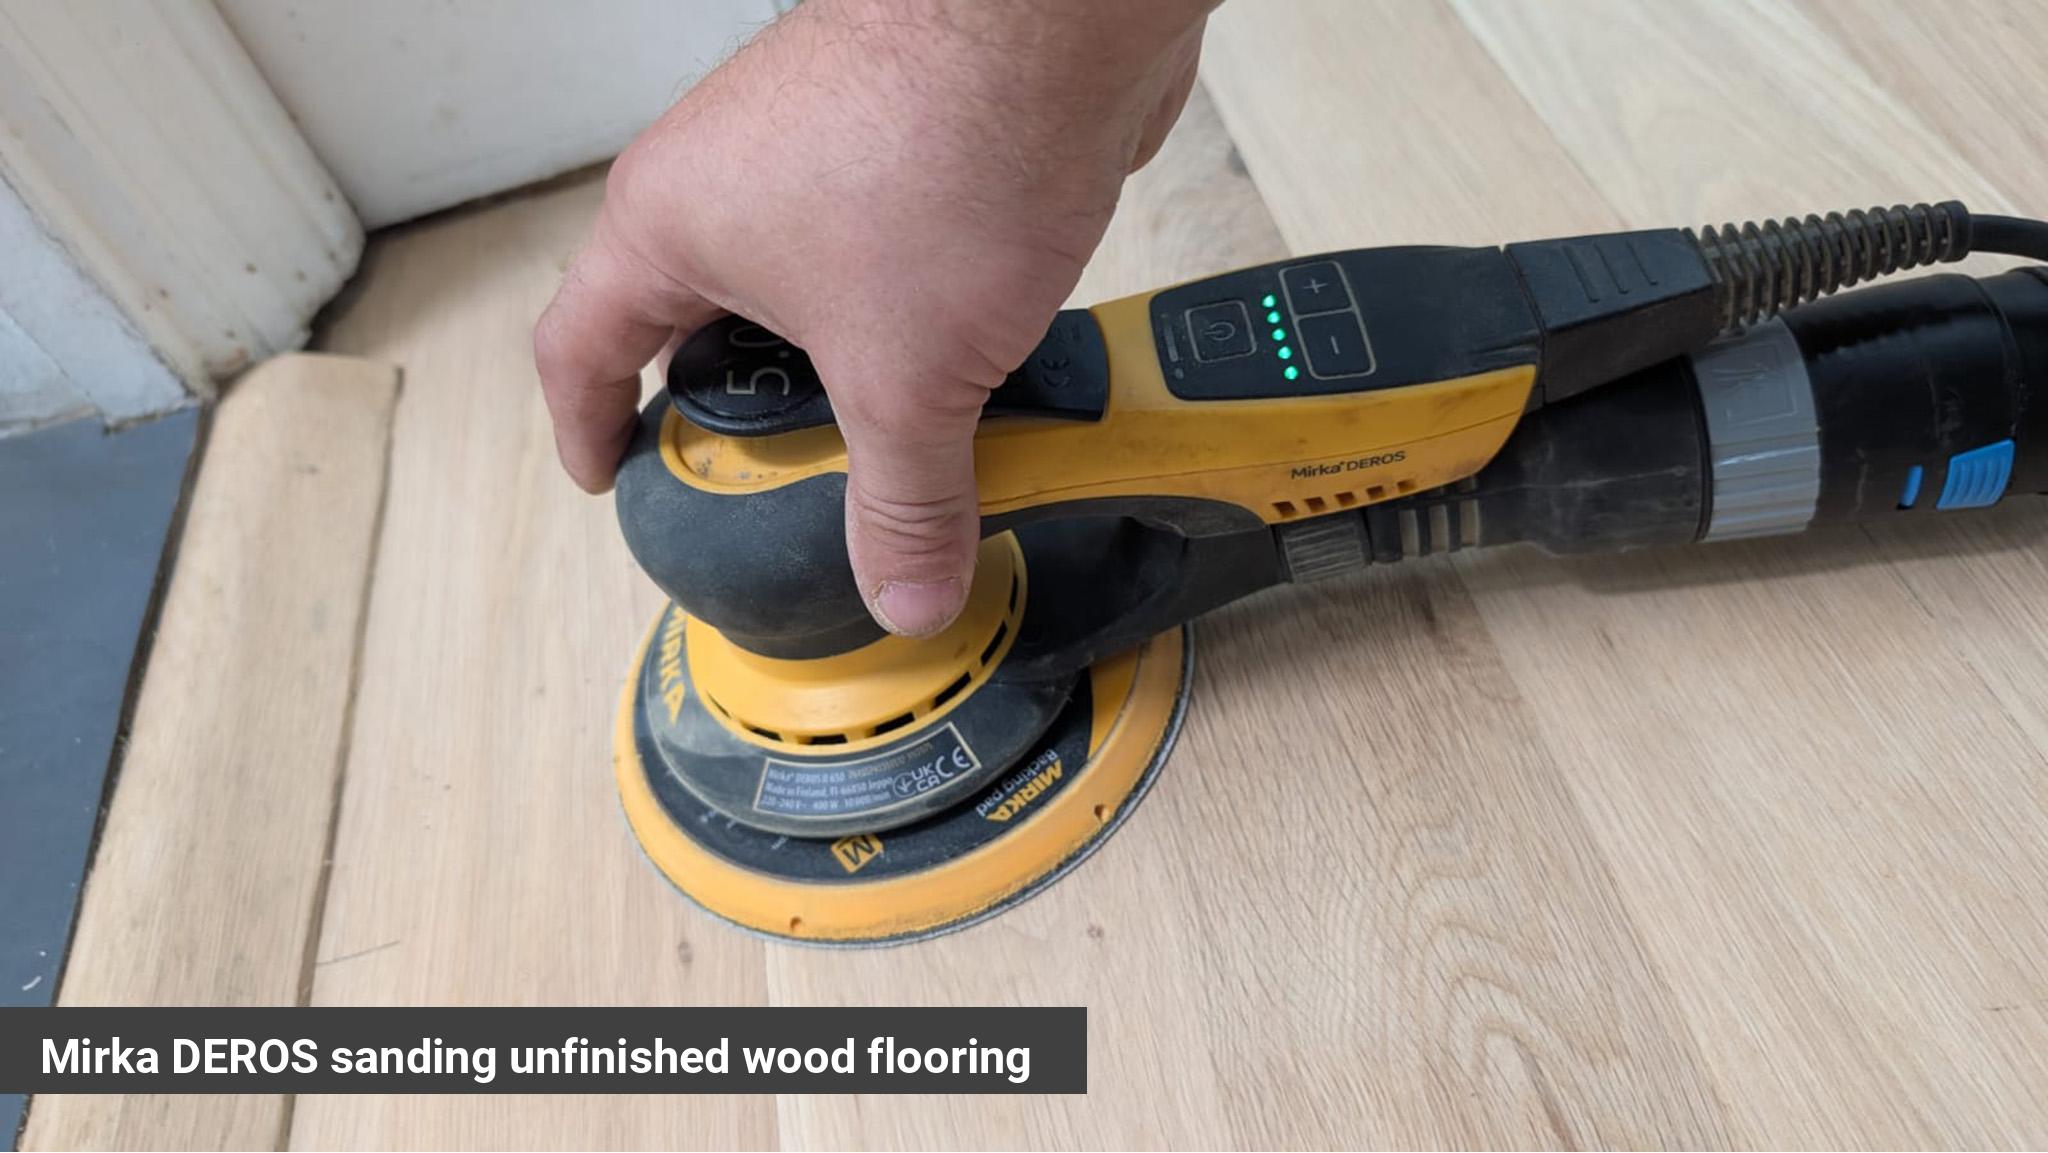
Stairs present a different sanding context — the large drum sanders used on main floor areas can't be used on individual treads, which means the work falls to the Mirka DEROS machines (both RS and DEROS II) and hand sanding in the tightest corners.
The grit sequence on stairs follows the same principle as the floor type being sanded — oak treads get the same grit progression as oak floors, pine treads the same as pine floorboards. The difference is the equipment and the time it takes. For our stair restoration service, the DEROS RS handles the initial stripping of old lacquer from treads efficiently, and the DEROS II 650 refines the surface through the finishing grits. For more on how these two machines work together, see our Mirka hand sanders comparison.
Between-Coat Sanding: The Grit Sequence Continues After the Finish Starts
The grit sequence doesn't end when the first coat of finish goes on. It continues between coats.
After the first coat of primer or lacquer has been applied and allowed to cure fully, a light pass with fine abrasive — typically P150 to P220 — flattens any grain raise and removes any dust particles or surface imperfections that settled before the coat cured. This is particularly important after the first water-based coat on bare timber, where the water causes the grain fibres to stand up — a process called grain raise — which leaves the surface rough to the touch and uneven in appearance.
Skipping the between-coat sanding produces a final finish that feels slightly rough and looks slightly uneven under raking light. Including it adds minimal time to the project and produces a noticeably better result from each subsequent coat.
At Floorworks, between-coat sanding with buffing screens is standard practice on every project — it's what produces the smooth, uniform finish surface that makes the difference between work that looks good in photos and work that still looks good in ten years.
Contact Floorworks™ for a Free Assessment and Consultation

The Abranet Abrasive — Why the Material Matters as Much as the Grit
A grit number on a standard sandpaper sheet and the same grit number on a Bona Abranet sheet perform differently — and it's worth understanding why.
Standard sandpaper is a solid backing with abrasive particles on the surface. As dust accumulates from the sanding process, it fills the spaces between the abrasive particles and reduces their cutting efficiency — a process called loading. A loaded sheet cuts less effectively, generates more heat, and produces a less consistent surface than a fresh sheet.
Bona Abranet is a mesh abrasive — the backing is an open net structure rather than a solid sheet. The mesh allows dust to pass through the abrasive layer rather than accumulating on the surface. The result is a sheet that stays sharp significantly longer, loads less, cuts more consistently throughout its working life, and performs more efficiently in combination with dust extraction systems.
At Floorworks, we use Bona dust-free floor sanding equipment throughout every project, and the Abranet abrasive system is part of that. The combination of mesh abrasive and effective dust extraction means the grit is cutting consistently from start to finish of each sheet — and the sanded surface that results is as consistent and clean as the equipment and abrasive choice can make it.
What Goes Wrong When the Grit Sequence is Skipped or Rushed
Most floor sanding problems that are visible in the final finish have their origins in the grit sequence. These are the common failures:
- Visible scratch marks under the finish. The most common. A floor that was taken from P40 directly to P100 — skipping the intermediate grits — carries the scratch pattern of P40 into the final finish. Under clear lacquer in raking light, these marks are immediately visible and can't be corrected without re-sanding the floor.
- Uneven finish absorption. A surface that wasn't taken to a consistent grit across the whole floor — perhaps because one area had a thicker finish that needed more passes — will absorb stain or oil at different rates in different areas. The result is a patchy, uneven finish that looks like a staining problem but is actually a preparation problem.
- Grain raise that wasn't addressed. A floor finished without between-coat sanding after the first water-based coat has a surface that feels rough and looks slightly cloudy — the grain fibres that rose with the water have been sealed in the raised position rather than being knocked back before the next coat.
- Early finish failure. A finish that was applied over a surface that wasn't clean enough, fine enough, or dry enough will fail earlier than it should — peeling, bubbling, or wearing through unevenly. The grit sequence is only one part of preparation, but it's the part that determines the mechanical bond between the finish and the timber.
The right grit sandpaper for wood floor sanding isn't a single number — it's a carefully chosen sequence that starts at the coarsest grade the floor's condition genuinely requires and works progressively to the finest grade that produces a surface ready for finishing. The starting point changes with the floor type, the species, and the current condition. The finishing standard — P100 to P180 buffing screens — is consistent across almost every floor type, because every floor that takes a professional finish needs to reach that standard of preparation.
At Floorworks, every floor sanding project starts with an assessment of the floor's condition that determines the right starting grit — and we use Bona dust-free equipment and Bona Abranet mesh abrasives throughout, which keeps the cutting consistent and the surface free of contamination at every stage of the sequence.


